Friday, January 31, 2014

All About Pinterest Part 2!


Welcome to part 2 of our All About Pinterest series!  In part 1 we discussed why Pinterest is beneficial to bloggers, how to get started, how to pin new content and quick tips for Pinterest-blog harmony.  Click here to check out Part 1!

The next step after pinning content is the repin.

So let's talk about re-pinning.  Besides pinning from your own blog or other websites you like, you can also repin from your news feed.  Repinning is a very easy way to save pins you love, but you should keep in mind that not all pins are what they appear to be!  Sometimes you repin something that looks really great, like a recipe or an outfit or a how to.  Later you go back to check out that pin only to find the site is spam, or has no directions, just pictures.  Here are some tips from our Pinterest expert, Ellie, on how to avoid "repin disappointment":

1. Always click on the pin! Sometimes pages aren’t there anymore, the link is wrong, or it simply isn’t as described. Just take two seconds, click, and if it works and it looks like something you want to hang on to, REPIN.

2. If it is a recipe, click on the pin and check the COMMENTS section of the post. If there are no comments, then it is a gamble but usually there are and they can be super helpful and honest. If 20 people write and say they just can’t get that no-knead bread to rise, chances are it is not a great recipe. There may also be tips on how to make the recipe better or more healthy so it is a win-win.

3. If it is something you would like to buy, click the link to see if it goes to a store, if it is still available, and if it is in your price range. Sometimes I will just repin something because I like the photo or just want something similar BUT if it is something I am pinning because I would really like to own that exact thing, I click first.

Quick and easy- how to repin:


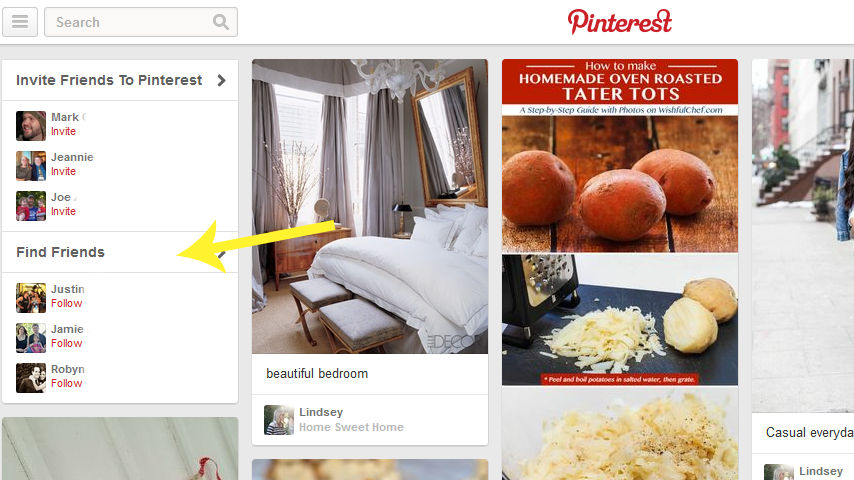
Step 1: Click the pin you want to repin from your news feed.  It will open up in this screen and you click "Pin It."  There is also an option to "like" a pin, but that does not allow you to organize it in your boards, nor does it show up in your feed.  Therefore, the pin itself will not get more traffic, which is counterproductive if you are trying to help a friend out by repinning their content.


Step 2:  Choose the board you want your pin to go to.  Then check the description to see if it says something helpful to you.  You can change the original description if you want.  Then, click Pin It, and there you have it!

Now we know all the basic things to do on Pinterest so let's get a little more advanced!

How to add the pin it button to your blog.

This is different than the pin it button you added to your web tool bar!  Adding the pin it button to your blog allows people to pin directly from your blog, even if they don't have the pin it button in their own toolbar.  This can be beneficial to you for getting more pins to your blog!

The most simple way to add this is to use the Pinterest Widget Builder. Which looks like this:


As you can see, from the widget builder screen I can build a pin it button, follow button and profile widgets.  The pin, profile and board widgets are great to show off a pin or board in your blog posts or you can add them to your sidebar to show off your profile!

Here is another tutorial on how to add a pin it button to your blog posts.  This one discusses how to add coding to your blog so the pin it button shows up in every post.  There are several other tutorials out there, let us know if you find a good one that worked for you!  Just in case that one doesn't work for you here is another option!  This blog also reminds us to back up our blogs before making any changes to our HTML codes- great tip!

If you don't understand any of this or don't want to deal with HTML coding, you can also hire a blog designer to add a custom pin button for you!  Generally (from what I've seen) they charge $15-$25 to add a custom pin it button to a blogger blog.

Pinterest Reminders for good pins:

1. Make sure you blog post has clear, original images or graphics that are attractive.

2. Add a description that is catchy, relevant and useful.

3. Make sure your link works!  Be sure to link directly to the post, not the main URL of your blog.  If people click through from Pinterest to your blog, they want to see the content they are clicking on from Pinterest, not just your blog in general.

Last but not least, I will leave you with this infographic with some helpful Pinterest statistics:


Happy Pinning Everyone!! 

Did you enjoy our Pinterest series? Please let us know, if more members are interested we can add to this series in the future!

Connect with us!
Bloglovin //Twitter //Pinterest //Facebook

Friday 5 Link Up
& 5 Beauty Myths Debunked

 Welcome to the Friday Five!  We invite you to link up your Friday Five post with us today (and every Friday!).  Anything goes, as long as it's a list of five!
 Today's Friday Five featured post comes from May who writes the blog La Vie En May.

5 Beauty Myths Debunked
Beauty myths are all around us, and sometimes it’s hard to tell the difference between a good tip and a myth. I looked into a lot of common beauty tips I’ve heard over the years and put together a list of the top 5 most interesting beauty myths. I even tested out some myself! Check it out below.
Myth #1 The best place to apply perfume is on your neck.


Yes…and no. It really depends where on the neck. You want to spray perfume on the “pulse points” because these areas emanate heat, which help emit fragrance from the skin to the air. The best places to spray on perfume are inner wrists, back of your neck and behind earlobes.


Myth #2 Concealer should be lighter than foundation.


I’ve actually fallen trap to this one. Concealer should be almost the same color as your foundation. If your concealer is too light, it’ll end up drawing attention to those spots, which is something you’re trying to avoid!


Myth #3 Orange/Yellow Hued Lipsticks Make Your Teeth Look More Yellow


Lip colors with orange and yellow undertones are known as no-no’s because it could make your teeth yellower. But let me tell you ladies, that is false! You can wear all the orange/yellow hued lipsticks you’d like AND be a coffee addict too (my life right here). Don’t believe me? Check out the comparison I did below.


On the left, I’m wearing Urban Decay’s Super Saturated Lip Color in ‘Punch Drunk’ and on the right, I’m wearing ‘F-bomb.’ I don’t think my teeth look any yellower in the left photo versus the right photo.  


Myth #4 Makeup products are only good for 1 year.


Not true at all! It depends on the product. Powder makeup, eye liners, lip stick, nail polish and blush last a good 2 years, while liquid foundation and lip gloss last about a year. Shockingly, mascara and liquid liners only last about 3 months! This rule applies after you’ve started using the product. If you leave a product unopened, it can last much longer. Watch out though, most makeup products are only good for 3 years unopened. So if you bought a lipstick 2 years ago and start using it now, you have one good year until you need to throw it out.


Myth #5 Your foundation color usually stays the same.

It sounds true, but it’s actually far from it. Marketing studies show that skin pigmentation changes at least twice a year, depending on your exposure to the sun. For example, the East coast is exposed to varying weather conditions more than the West coast, so that can affect skin pigmentation. Usually, people are lighter during the winter than during the summer. I’m experiencing this right now. My foundation color is too dark for me and I need to switch to a lighter color!  


Thanks for the great tips May!  Be sure to check out her blog!

Now it's your turn.  Link up your Friday Five post with us below!  Please link up directly to the post, not just to your blog's main page!

Connect with us!
Bloglovin //Twitter //Pinterest //Facebook

Thursday, January 30, 2014

All About Pinterest Part 1: Why Use Pinterest & How to Get Started

On Monday we started our new hop which is a Pinterest link up.  You might be wondering why we started this up, and how Pinterest can be beneficial to you!  We hope to answer all your questions and more in this two part series All About Pinterest!


Why should I use Pinterest?

It's pretty straightforward: Pinterest is one of the top ways to drive traffic to your blog.  Besides perusing for recipes, home decor and cute puppy pictures there are tons of great ideas on there- and one (or more) of those ideas can, and should, be yours!  Pins from your blog post drive traffic directly to your blog and give you more exposure.  Hopefully, people coming from Pinterest like what they see in that post and stick around for more.

While looking at my blog statistics I see that Pinterest is second in the list of referring sites.  That's second only to google searches.  It is also fourth on the list of referring sites after bloglovin.  And I don't even have very many pins connected to my blog, so you can just imagine how much higher on the list it could be, had I pinned more of my posts!

So let's talk about how to get started!

Setting up your account is easy, just sign in using Facebook, Twitter or your email.  Follow the directions to set you account up.


The next step is to follow follow follow!  Pinterest suggests people you may know through the social media sites you connected with, as you see in the example above.  So, if you connected to your Twitter and Facebook, you will see suggestions of people you are friends with on those sites. You can also invite friends who don't have accounts set up, but are your friend on Facebook or Twitter.  

You can also go to blogs you love and find their pinterest follow link, or just search for topics of interest in the search bar and follow new people that way!  Of course you could also go to a Pinterest link up and find new people to follow in the link up as well.

There are two ways to follow people.  In the left picture above you see Ellie's account and the "Follow All" button.  Simply click to follow all her boards.  That means you will see all her new pins in your feed and will also automatically follow any new boards she creates.  You can also follow only specific boards from people's accounts, if only those are of interest to you.  In the example to the right, I am choosing to only follow her "color inspiration" board.  However, for maximum pinterest activity, it is always nice to follow all the boards.

The next thing you should do is to create and organize your boards.  Boards are groups of pins organized by a certain topic.  For example:


In this example we see Rachel has 52 boards and these are the four at the top.  When you pin or repin something you choose which board to place that pin into, so you can keep all your pins organized.  You can create new boards using the "create a board" button to the left, or when you pin a new pin you can create a new board to fit that pin right in that screen!

So now we know the why to use Pinterest and how to set up your account.  But how can you make Pinterest beneficial to your blog?  Get started by pinning things from your blog!


There are several ways to add new pins, besides repinning pins from your news feed.  You can add your own pins in the following ways- click the red + button next to your account name.  You can upload a pin or add from a website here.  But, as the picture above shows, the best way to add new pins is by installing the "Pin It" button to your web tool bar.  Simply click the link "The Pin It Button" and then follow the instructions to install it to your browser tool bar.

Once that is installed, you can pin from any site!  When you see something you like, or want to share from your own blog just click the pin it button, choose the picture you want associated with that link and the board you want to pin it to and then pin it!

Quick Tips for Pinterest-Blog Harmony:
 These tips are good to keep in mind when you are linking up with Pinterest hops, like ours, as well!

Tip 1: Be sure to have an attractive image in your post if you want people to pin it!  Pinterest is visual, so if your post is just words with no pictures, it is very unlikely to get pinned.  (if you link up to a pin party like our hop, and your post does not have a picture or graphic of some sort, it will not get pinned)

Tip 2:  Add a short description with key words that will direct people to your pin when they search.  Hash-tags are not necessary.  A pin with a good description will rate high on the search list and get more traffic.  For example: "5 tips for traveling with kids" instead of "Our family trip to the beach."

Tip 3: When linking up to pin parties or hops, be sure to link up to the exact post you want pinned, not just your blog URL.  If you link up to your blog, the host of the party will not know which post you want pinned, and you will likely get no pins from that party because of it.

I hope All About Pinterest Part 1 was helpful to you!  

Stay tuned tomorrow for more advanced Pinterest tips including: adding the pin it button to your blog posts, how to properly repin, special tips from pinning expert Ellie and more!


Connect with us!
Bloglovin //Twitter //Pinterest //Facebook

Wednesday, January 29, 2014

PA Meetup: The Uncorked Artist

Hey PA!! Jacquelyn from justjacq back (haha that rhymes) planning another get together for you!

Have you heard of The Uncorked Artist? It's pretty cool so allow me to explain. Basically you and some girlfriends get together, drink wine, and paint a painting that a local artist is teaching you how to paint. You aren't limited to the exact colors of the paininting so everything comes out custom. Let's say you're doing a flower and their flower is yellow with a pink vase. Yours can be a white flower in a black vase. Whatever you want! Get it?

Anyway, they have this calendar where they display the painting they'll be doing at that time and you can sign up for that time. Space is limited which is why you have to sign up. Or, even better, you can book a private party, pick your own painting and have the space to yourself!

So here's the deal. I'm putting this event idea out there to see how much interest there is because you have to have a minimum of 10 painters to book a party. The price for an evening party is $35, $30 for an afternoon, and $25 for the morning which are the same prices as a public party. Because we need a minimum of 10 people I thought we'd open this event up to friends as well. So grab your best gal pal and come paint a painting! If you're interested, please fill out the form below so I can start to plan this event.

P.S. because we are still responsible for the full price of the party (as in, we'd still be responsible for $350 if we did an evening party even if less than 10 people attended) I will probably request payment up front. This will also cover the deposit required for the party. If we get less than 10 RSVP's I will refund everyone's payment.

The Uncorked Artist
1414 Old York Rd
Warminster, PA 18974

(if you can't see the form below, use this link https://docs.google.com/forms/d/1SGtyDg8DEMnvLsUKwmJvFPCBtINHMn644-v7W2Kng_s/viewform)

Connect with us!
Bloglovin //Twitter //Pinterest //Facebook

Blog of the Week: Glossy Blonde


This week our blog of the week is Glossy Blonde, written by Niki!  

Meet Niki:
 
 
First, let me just say that Glossy Blonde refers to my deep love of lip gloss… and more obvious, the fact that I’m blonde.  I am not a conceited little b* and I do not have glossy, flowing locks – on the contrary, more often than not it’s more like a tousled mess…  I’m just your average fashion and beauty addict who loves to bake (and eat).  I deliver my honest thoughts, finds, recipes and reviews to you on this here blog, oftentimes with a side of sass.

I am married to my best friend in the whole entire world; and we live with our 3 “kids” - a pit bull, a shepherd mix, and a very large kitty, all rescues!  If you follow me on any form of social media, you’ll see them often.

My hubby takes all of my outfit photos, although sometimes he becomes a little diva and I imagine him in a beret ordering people around  (other than that all photos are taken by me unless otherwise indicated).  He is also wicked metro and loves GQ.  We joke that he should start his own fashion blog… but I never want to see him in “meggings.”  Just… no.

I’ve loved fashion and style as long as I can remember, and I’ve never been one to care to blend in.  Some of my first memories involve being forced into outfits I hated, which evolve in my teenage years into not being let out of the house half the time (not because my outfits were slutty, because I looked “ridiculous” according to my ultra-conservative, prepster mother).  Granted, I’ve made some questionable outfit decisions and I love to ride the line of what is “acceptable”… with style and with life in general.  But I stand by my decisions (most of them).

I am also incredibly obsessed with beauty products and I love all things pretty.  I have a bathroom full of goodies and I’ve even gotten the hubby to spark an interest in man products.

And I’ve inherited a lot from my Dad (you can read more about his – and my – shopping addiction here), one of those traits being my proclivities for sweets.  And my vocabulary (my Dad loves the word “proclivities”).  I love to bake in my spare time and come up with new, fun, delicious recipes!

Finally, I am a little worker bee.  I work full time, I’m working on my MBA at night, and I’m also working on opening a clothing/accessories boutique.  The online portion will hopefully be up and running soon, with a brick and mortar storefront to follow in the future!  Work, work, work.  But I love this stuff!
http://www.glossyblonde.com/

Thanks Niki!  Be sure to check out her blog, Glossy Blonde, this week and give her a follow or two!
 
Connect with us!
Bloglovin //Twitter //Pinterest //Facebook

Tuesday, January 28, 2014

Bloglovin Link Up


Welcome to our Tuesday link up!  This week's link up is all about Bloglovin!

Link up to your bloglovin below and then be sure to go and follow some of your fellow Northeast Bloggers on bloglovin!

Please link up to your bloglovin only, not to your blogs main page!


Connect with us!
BloglovinTwitterEmailRSSPinterestFacebook

Monday, January 27, 2014

The Pin Committee #1


Welcome to the very first week of the Pin Committee link up!

Do you have a "pinnable" post from last week that you'd love to see more traffic to from Pinterest?  Then this link up is for you!  Our Pin Committee wants to help you increase your Pinterest traffic and here's how:

Link up below with your most pinnable post from the last week.  Our Pin Committee will then work on pinning your post!  Combined, our committee has thousands of followers, so you know your post will be seen!

You are probably wondering- what's the catch?  Well in return we only ask that you follow our Pin Committee members on Pinterest (and their blogs if you'd like!) and return the favor by pinning a few of the other post in the link up!  We also ask that you are a Northeast Blogger member to participate.
Meet our Committee:


Not Pictured (yet!):
Emily of Words I Wheel By Follow Emily

If you are interested in joining our Pin Committee please don't hesitate to let us know!  The more the merrier!

And now it's time to party!  Link up your recent pinnable post below!

Connect with us!
BloglovinTwitterEmailRSSPinterestFacebook

Saturday, January 25, 2014

The Weekend Wander Hop!

 Welcome to the Weekend Wander Hop!  Brought to you every weekend by the Northeast Bloggers Network!  

Link up your favorite post of this week that you want to share!  Then, be sure to go visit other blogs in the hop and leave them a comment as well!

Have a fun weekend!


Connect with us!
BloglovinTwitterEmailRSSPinterestFacebook

Friday, January 24, 2014

The Petites Link Up!

Today we are co-hosting the Petites Link up with one of our members Rebecca!  Rebecca writes the blog Caravan Sonnet and came up with the idea for the Petites, a link up for blogs with less than 400 followers only!  This link up is a great way for "small" blogs to gain more followers and meet other bloggers!

Here are Rebecca's thoughts on it:
 
TODAY is the eighth month of something that I am VERY excited about (and hope you will be too!)! I LOVE discovering friends in bloggy world and so many of my bloggy friends say the same thing! Today we are continuing a monthly link up {on the 24th of each month} for those of us that are known as small tiny the petites in bloggy world! If you are a blogger who has less then 400 followers via anything "blog related" then this is your opportunity to make some new friends, find new blogs, and discover others in the petite section of bloggy world! 

The only rule is that if you are linking up you are a blogger with less than 400 followers in the area that you link up (GFC, Bloglovin, Twitter, Pinterest, Instagram, etc.)! *smiles*

While it is not required it would be great if you shared the button with others so that everybody can get in on the fun! {You can find the code listed on the side and can adjust the size accordingly for your blog!}


You are not required to follow me but it sure would be nice! *smiles* I would love to connect with y'all on instagram! IF you do become a new follower leave a comment here so I can follow you back! You can follow me on instagram by clicking HERE
 
This month I am delighted to have the Northeast Bloggers Network co-hosting with me! It has been such a delight to get to know different bloggers from the Northeast through this network. The lovely designer of the network Rachel is wonderful at truly providing opportunities for everyone to connect online and in person. She is a delight to know! 

Please take a minute to check out this lovely group of bloggers! You can follow them Bloglovin by clicking HERE!

If you follow them please leave a comment so that they can follow you back! Stop on over and visit other blogs and make some new friends who are other petites in bloggy world!

Would you like to co-host? I have openings for co-hosting in April 2014! 
Send me an email at: caravansonnet (at)gmail(dot)com.


Connect with us!
BloglovinTwitterEmailRSSPinterestFacebook

Friday Five Hop and 5 Winter Soups!

Welcome to the Friday Five!  We invite you to link up your Friday Five post with us today (and every Friday!).  Anything goes, as long as it's a list of five!

Today we are featuring a Friday Five post from Steph, who is sharing Five Winter Soup Recipes with us!

Via
Wonder twin powers, activate! Form of: Sunday soup.

Soup is crucial to my life. I make a pot of Sunday soup every week to take for lunch. I grew up coming home from school to my Mom Mom's house and she'd have a pot of soup on the stove, just about done. I'd eat saltines with butter and my bowl of soup. To me, soup is Mom Mom. Childhood. Home. Comfort. Love.

I like to try new soups every year, but I have some tried and trues that are always on the menu.

1. Veggie Beef Barley Soup


1/2 Cup chopped onion (you can cheat and use frozen chopped onions)
1 Cup frozen green beans
Up to 8 oz mushrooms (optional)
2/3Cup uncooked barley
1 Cup corn
1.5 Cups water
1TSP salt
1/2 tsp thyme leaves
S&P to taste
1 lb ground beef
1 lb beef stew meat (optional)
3 14.5 oz cans beef broth
2 cans diced tomatoes 
8 oz can tomato sauce

Brown ground beef and onions, drain and put in crock. If you are using mushrooms, saute for about seven or eight minutes. If you are using stew meat, toss in a bit of flour and sear. Add to crock with all other ingredients and cook on low 7 hours or high 3 hours. 


You can also do this on the stove, of course. Just bring everything to a boil, then simmer for an hour or two. 

2. Hungarian Mushroom Soup
12 oz mushrooms, sliced (I usually use 8 oz carton of baby bellas and 1/2 carton of white)
2 cups chopped onions
2 TBS butter
3 TBS flour
1 cup milk (I use 1%)
1 tsp dill weed
1 TBS paprika
1 TBS soy sauce
2 C stock (beef, veggie, or chicken)
2 tsp lemon juice
dried parsley
salt and pepper
1/2 cup sour cream

Saute onions in 2 TBS of stock for 3 minutes. Add mushrooms, 1 tsp dill, 1/2 cup stock, soy sauce and paprika. Cover and simmer for 15 minutes

Melt butter in large saucepan. Whisk in flour and cook, constantly whisking, for about 2 minutes. Add milk and cook, stirring frequently, about 10 minutes over low heat. It should be thick.

Stir in mushroom mix and remaining stock. Cover and simmer 15 minutes. Add salt, pepper, lemon juice, sour cream, stir well to combine.

I often double this recipe so we have enough for the week. I only add one additional cup of onions though, not two.

3. Stuffed pepper soup a la Skinny Taste.

1 lb ground turkey
1.5 cups chopped pepper (I like to use two different ones. Green and red or orange or yellow)
1 cup onion, diced fine
3 cloves garlic, chopped
2 14.5 oz cans petite diced tomatoes
2 cups tomato sauce
2 cups broth (I've used chicken, veggie, beef - all good)
salt and pepper to taste
1/2 tsp oregano
1/4 tsp thyme
3 cups cooked rice (use brown - it's healthy and you really can't tell in this soup)

Brown meat and drain, reduce heat. Add peppers, onions, and garlic. Cook for about five minutes on low.

Add tomatoes, sauce, broth, marjoram and S&P. Cover and simmer on low for 30 minutes. Add rice.

Sometimes I double this and freeze half of it so I'll have it on a weekend I'm too busy to make soup.

4. Creamy Cauliflower Cheddar Soup from Annie's Eats. Click the link and follow her directions - the only thing I do differently is sometimes I use onion for the shallots, and I don't do the croutons.

5. Potato soup

10 medium potatoes, scrubbed well and cut into cubes (I use red or gold and I do not peel them - peel if it's your preference)
3 TBS flour
6 slices bacon, chopped and cooked (optional)
2 TBS bouillon/base (I normally use chicken but have also used veggie)
1 TBS ranch dressing mix
Dried parsley, garlic powder, onion powder, seasoned salt, ground black pepper to taste
3 Cups of water
1 Cup half & half or milk (I've used half & half and 2% milk, both were fine)
shredded cheddar and green onion for topping (optional)

Put the potatoes in the bottom of the crock, top with flour and toss to coat. Throw bacon bits, bouillon and all spices over. Add water.

Cook on low for 7 hours or high for 3-4. Pour half and half in, cook another 15 minutes. Dunzo.

Sometimes I put my immersion blender in and make it a little smoother.

You can also do this on the stove top, just bring to a boil and then simmer until potatoes are tender, add in the half and half and cook for another 10 minutes.

Soup's up! Make some this weekend. It's winter after all.

 photo sig_zps5088e59f.jpg

Thanks Steph!!  Do you have a Friday Five you'd like to share with us this week?  Link up your post below!  And if you want your post featured in our Friday Five post please email us!

Connect with us!
BloglovinTwitterEmailRSSPinterestFacebook